How to Prevent Frozen Pipes This Winter
As winter’s chill descends across the United States, homeowners everywhere face a common, costly threat: frozen pipes. A burst pipe can cause thousands of dollars in water damage, disrupt your daily life, and create a significant headache. Fortunately, with a bit of preparation and awareness, you can safeguard your home from this seasonal hazard. This comprehensive guide will walk you through everything you need to know to prevent frozen pipes this winter, from understanding which pipes are most vulnerable to knowing exactly what to do if the worst happens.
Table of Contents
- Which Pipes Freeze First (And Why)
- How to Insulate Pipes Before Winter Hits
- What Temperature Do Pipes Freeze At?
- How to Keep Pipes Warm During a Cold Snap
- What to Do If Your Pipes Are Already Frozen
- When to Call a Plumber (And What It Costs)
- How PlumberFinderUSA Helps in a Winter Emergency
- FAQ
- Find a Verified Plumber Near You
Which Pipes Freeze First (And Why)
Understanding which pipes are most susceptible to freezing is the first step in effective prevention. Not all pipes are created equal when it comes to battling the cold. Generally, any pipe exposed to unheated areas or direct cold air is at the highest risk.
- Pipes in Unheated Areas: These are prime targets. Think crawl spaces, basements (especially unfinished ones), attics, garages, and utility rooms that aren’t adequately heated. Even if your main living space is warm, these peripheral areas can drop to freezing temperatures very quickly.
- Pipes Along Exterior Walls: Plumbing that runs through exterior walls, particularly those facing north or exposed to prevailing winds, is highly vulnerable. The wall cavity itself might not offer sufficient insulation to protect the pipes from prolonged exposure to freezing outdoor temperatures.
- Outdoor Spigots and Hose Bibs: These are designed for outdoor use but often have an interior shut-off valve that needs to be properly managed before winter. If water remains in the pipe segment between the shut-off valve and the spigot, it will freeze and can easily burst.
- Pipes with Minimal Insulation: Even within heated areas, if a pipe section has little to no insulation and is near a drafty window or door, it can still freeze. The colder the ambient temperature and the longer the exposure, the higher the risk.
- Pipes with Low Water Flow: Pipes that don’t see much water movement, such as those leading to rarely used guest bathrooms or outdoor fixtures, are more prone to freezing. Stagnant water freezes faster than moving water.
The “why” behind these vulnerabilities is simple physics: heat loss. When the temperature outside drops, heat from your pipes dissipates into the colder surroundings. If the rate of heat loss exceeds the rate at which heat is supplied (either by the water itself or surrounding warmth), the water temperature in the pipe will eventually drop to freezing point. Wind chill exacerbates this effect by accelerating heat transfer away from the pipe’s surface.
How to Insulate Pipes Before Winter Hits
Proactive insulation is your best defense against frozen pipes. By adding a protective barrier, you slow down heat transfer, keeping the water inside your pipes above freezing for longer. Here are some effective insulation methods and their typical costs:
- Foam Pipe Insulation Sleeves:
- Description: These are pre-slit, tubular foam pieces that slip easily over your pipes. They come in various diameters to fit common pipe sizes (1/2-inch to 2-inch). Made from polyethylene or fiberglass, they offer a quick and effective DIY solution.
- Application: Simply cut to length, open the slit, and snap it around the pipe. You can secure the seams with insulation tape for extra protection.
- Costs: Very affordable, typically $1 to $3 per 6-foot section. A small house might need $20-$50 worth of material, while a larger home with extensive exposed piping could range from $50-$150.
- Fiberglass Pipe Wrap:
- Description: Similar to fiberglass insulation used in walls, this comes in rolls and is wrapped around pipes. It offers excellent thermal resistance but requires gloves and a mask for handling due to fiberglass particles.
- Application: Wrap it snugly around pipes, overlapping layers, and secure with insulation tape or ties.
- Costs: Slightly more expensive than foam sleeves, ranging from $5 to $15 per roll (typically 10-20 feet). Best for irregular pipe shapes or areas needing superior insulation.
- Heat Tape or Heating Cables:
- Description: These electrical cables provide a direct heat source to pipes. They come in two main types:
- Self-Regulating: These automatically adjust heat output based on ambient temperature, making them very efficient and safer.
- Manual: These provide constant heat and must be plugged in and unplugged manually or connected to a thermostat.
- Application: Wrap the tape spirally around the pipe, ensuring good contact. Follow manufacturer instructions carefully, especially regarding overlapping and securing. Always plug into a GFCI outlet.
- Costs: More of an investment, ranging from $20 for a basic 6-foot manual tape to $100+ for longer, self-regulating kits. Professional installation for extensive heat tracing can cost several hundred dollars.
- Description: These electrical cables provide a direct heat source to pipes. They come in two main types:
- Hose Bib Covers:
- Description: These are insulated covers that fit over outdoor spigots, providing a barrier against cold air.
- Application: Ensure you’ve disconnected your garden hose and drained the spigot first, then simply place the cover over the fixture.
- Costs: Very inexpensive, usually $5 to $15 per cover.
- Other Insulation Tips:
- Seal Air Leaks: Use caulk or weatherstripping to seal cracks and openings near pipes, especially in basements, crawl spaces, and around exterior walls.
- Insulate Walls and Ceilings: For pipes running through unheated spaces, consider adding batt insulation to adjacent walls or ceilings to improve ambient temperature.
- The Critical Threshold: For pipes to freeze, the water inside them must reach 32°F. This typically happens when the ambient temperature around the pipe drops to 20°F (-6°C) or lower for a sustained period (several hours).
- Factors Influencing Freezing Time:
- Duration of Cold: A brief dip below freezing is less risky than prolonged exposure.
- Insulation: Well-insulated pipes will take much longer to freeze than uninsulated ones.
- Location: Pipes in unheated areas (crawl spaces, attics, exterior walls) are at higher risk because the ambient temperature around them drops much faster than inside your heated living space.
- Wind Chill: Wind significantly increases the rate of heat loss from exposed pipes, making them freeze faster even if the air temperature isn’t extremely low.
- Water Flow: Moving water is harder to freeze than stagnant water. A slow drip can sometimes be enough to prevent freezing.
- Pipe Material: While all water freezes at the same temperature, different pipe materials (copper, PVC, PEX) have varying thermal conductivities and burst resistances.
- Maintain Consistent Indoor Temperatures: Avoid turning your thermostat down drastically at night or when you leave the house. Keeping your home consistently warm (e.g., 60-65°F or higher) ensures that heat permeates to areas where pipes run, even those in exterior walls or unheated spaces.
- Open Cabinet Doors: For sinks located on exterior walls, open the cabinet doors underneath to allow warmer room air to circulate around the pipes. This is especially important in kitchens and bathrooms.
- Let Faucets Drip: During extreme cold, a small, pencil-thin stream of cold water from faucets connected to vulnerable pipes can prevent freezing. Moving water is less likely to freeze than still water. Choose a faucet on an exterior wall or one that has frozen in the past.
- Disconnect Garden Hoses: This is a critical step. Remove all garden hoses from outdoor spigots. If left connected, water trapped in the hose can freeze and expand back into the spigot and connecting pipe, causing a burst.
- Drain Outdoor Spigots: After disconnecting hoses, if your outdoor spigots have interior shut-off valves, turn off the valve, then open the outdoor spigot to allow any remaining water to drain out. Close the spigot once drained.
- Seal Air Leaks: Use caulk or weatherstripping to seal cracks and openings near pipes, especially in basements, crawl spaces, and around exterior walls. Even a small draft can significantly lower the temperature around a pipe.
- Open Interior Doors: If you have rooms that are typically kept cooler, open their doors to allow warmer air from the rest of the house to circulate. This includes utility closets or laundry rooms where pipes might be located.
- Use Space Heaters (with Caution): In particularly cold, unheated areas like basements or garages, a space heater can provide supplemental warmth. Always ensure it’s placed safely away from flammable materials and is not left unattended.
- Know Your Main Water Shut-Off: In case a pipe does burst, knowing how to quickly turn off your main water supply can minimize damage. Locate it now and ensure it’s easily accessible.
- Confirm the Problem: You might notice a lack of water coming from a particular faucet, visible frost on a pipe, or a slight bulge in the pipe. If no water comes out when you turn on a faucet, and other faucets in the house work, you likely have a localized freeze. If all faucets are dry, the main supply line might be frozen.
- Turn Off the Main Water Supply: This is a crucial first step. If the pipe bursts during thawing, turning off the water will prevent catastrophic flooding.
- Open the Faucet: Open the faucet that the frozen pipe supplies. This allows water to flow out as the pipe thaws and relieves pressure, which can help prevent a burst.
- Apply Gentle Heat: Slowly and gently warm the frozen section of the pipe.
- Hair Dryer: This is often the safest and most effective DIY method. Move the hairdryer back and forth along the frozen section.
- Heat Lamp: Position a heat lamp a safe distance from the pipe, ensuring it’s not touching any surfaces.
- Heating Pad: Wrap a heating pad around the pipe.
- Warm Towels: Soak towels in hot water, wring them out, and wrap them around the pipe. Replace them as they cool.
- Work from the Faucet Backwards: If possible, start applying heat closest to the faucet and work your way back towards the main water supply. This allows melted water to escape.
- Be Patient: Thawing can take time, sometimes several hours, depending on the severity of the freeze. Don’t rush the process.
- DO NOT Use Open Flames: Never use a blowtorch, propane heater, or any other open flame device to thaw pipes. This is extremely dangerous, can damage pipes, and is a significant fire hazard.
- DO NOT Use Boiling Water Directly: Pouring boiling water directly onto a frozen pipe can cause it to crack or burst due to thermal shock.
- Check for Leaks: Once water flow is restored, carefully inspect the thawed pipe section for any signs of leaks or cracks. Even a small crack can lead to significant water damage over time.
- If You Can’t Locate or Thaw It: If you can’t find the frozen section, can’t thaw it, or suspect a burst pipe, it’s time to call a professional plumber immediately.
- You Can’t Locate the Frozen Section: Pipes can freeze in hidden spots within walls or under floors, making them impossible for a homeowner to access or thaw safely.
- You Can’t Thaw the Pipe Yourself: If you’ve tried the DIY thawing methods and haven’t had success after a reasonable amount of time, the freeze might be more severe or extensive than you can manage.
- There’s No Water at Multiple Faucets: This could indicate a major freeze in your main water supply line, which is typically deep underground or in a difficult-to-access area.
- You Suspect a Burst Pipe: Signs include visible water leaking, bulging pipes, or a sudden drop in water pressure coupled with damp spots on walls or ceilings. If you hear a dripping or rushing water sound after thawing, but don’t see the leak, it’s very likely a burst pipe.
- You Lack the Proper Tools or Expertise: Attempting to thaw or repair pipes without the right knowledge or equipment can worsen the problem.
- You’re Unsure About Electrical Heat Tape Installation: If you’re using heat tape and are not confident in its safe and correct installation, a plumber can ensure it’s done properly to prevent electrical hazards.
- Thawing a Simple Frozen Pipe: For a plumber to locate and thaw an accessible frozen pipe, you might expect to pay anywhere from $100 to $300. This usually involves using specialized thawing equipment that is more powerful and efficient than household items.
- Repairing a Burst Pipe: This is where costs escalate significantly.
- Minor Burst Pipe Repair: For a small, accessible burst that requires a simple patch or section replacement, costs could range from $300 to $700.
- Major Burst Pipe Repair: If the burst is in a difficult-to-access area (e.g., inside a wall, under a foundation) or involves extensive damage requiring drywall removal, flooring repair, or multiple pipe sections, costs can easily jump to $700 to $2,000 or more. This doesn’t include the cost of water damage remediation.
- Emergency/After-Hours Fees: Plumbers often charge a premium for emergency calls outside of normal business hours (evenings, weekends, holidays), which can add $50 to $200+ to the overall service call fee.
- Instant Access to Verified Professionals: Our directory features only thoroughly vetted and verified plumbers. This means you can be confident that the professionals you find through our platform are licensed, experienced, and reputable, saving you the hassle and risk of searching through unverified listings.
- AI-Optimized Matching: Our advanced AI technology matches you with the best local plumbers equipped to handle your specific emergency. Whether you need urgent pipe thawing, burst pipe repair, or a comprehensive winter plumbing inspection, PlumberFinderUSA quickly connects you with experts in your area who are available when you need them most.
- 24/7 Availability: Frozen pipes don’t adhere to business hours. Our platform is accessible around the clock, ensuring that you can find emergency plumbing assistance no matter when disaster strikes.
- Peace of Mind: During a stressful plumbing emergency, the last thing you want is to worry about finding a reliable plumber. PlumberFinderUSA takes the guesswork out of the equation, providing you with peace of mind knowing that help is just a few clicks away.
- Q1: Can PEX pipes freeze and burst?
A: Yes, PEX (cross-linked polyethylene) pipes can freeze, but they are generally more resistant to bursting than traditional copper or PVC pipes. PEX is more flexible and can expand to some extent when water freezes inside it. However, while PEX might withstand one or two freeze-thaw cycles without bursting, prolonged freezing or extreme cold can still cause it to fail, especially at fittings or connection points. It’s still crucial to take preventative measures for PEX pipes.
- Q2: How long does it take for pipes to freeze?
A: The time it takes for pipes to freeze varies significantly based on several factors: the ambient temperature, the duration of the cold, the amount of insulation, the wind chill factor, and whether water is moving through the pipe. In extremely cold conditions (e.g., 0°F or lower with wind chill) and with minimal insulation, pipes can freeze in just a few hours. In less severe conditions (e.g., 20-30°F), it might take overnight or even several days for a pipe to freeze solid.
- Q3: Is it safe to leave a faucet dripping all night?
A: Yes, it is generally safe and often recommended to leave a faucet dripping during a cold snap, particularly for faucets on exterior walls or those that have frozen before. A slow, pencil-thin stream of cold water keeps the water moving, which makes it much harder for ice to form. This simple action can relieve pressure in the pipe, significantly reducing the risk of a burst. Just be mindful of water usage if you have a well or are concerned about your water bill.
- Q4: What’s the best way to drain outdoor spigots?
A: The best way to drain outdoor spigots is to first locate the interior shut-off valve that controls the water supply to that specific spigot. Turn this valve off completely. Then, go outside and open the spigot to allow any trapped water in the line between the shut-off valve and the spigot to drain out. Once no more water comes out, close the outdoor spigot. This ensures the pipe segment most exposed to the cold is empty. Don’t forget to disconnect any garden hoses first!
- Q5: Does homeowner’s insurance cover burst pipes?
A: Most standard homeowner’s insurance policies do cover damage caused by burst pipes, as long as the damage is sudden and accidental. However, there are important caveats. Policies typically do not cover damage resulting from negligence (e.g., not taking reasonable steps to prevent freezing, like failing to heat your home or insulate pipes if required). Additionally, the policy might cover the water damage, but not necessarily the repair of the pipe itself, or may have specific exclusions for certain types of plumbing issues. Always review your specific policy or consult with your insurance provider to understand your coverage.
While DIY insulation is often feasible, for complex piping systems or if you’re unsure, consulting a professional plumber for an insulation assessment can be a worthwhile investment. They can identify critical areas and recommend the most effective solutions for your specific home.
What Temperature Do Pipes Freeze At?
The common understanding is that water freezes at 32°F (0°C). While scientifically accurate, this doesn’t tell the whole story when it comes to pipes in your home. Pipes don’t instantly freeze the moment the outdoor temperature dips to 32°F.
So, while 32°F is the freezing point of water, don’t wait until it hits that mark to take precautions. When forecasts predict temperatures dropping below 28°F-30°F, and especially if they’re expected to stay there for more than a few hours or dip into the low 20s or teens, it’s time to implement your cold weather pipe protection plan.
How to Keep Pipes Warm During a Cold Snap
When the mercury plummets, even well-insulated pipes can be at risk. These actionable steps can provide crucial extra protection during severe cold snaps:
These temporary measures, combined with permanent insulation, offer the best defense against winter’s plumbing woes.
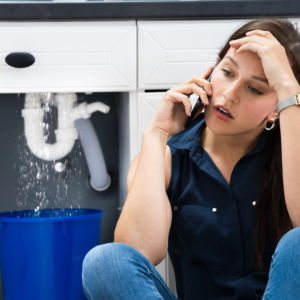
What to Do If Your Pipes Are Already Frozen
Even with the best prevention, sometimes pipes still freeze. The key is to act quickly and cautiously to thaw them before they burst. If you suspect a frozen pipe:
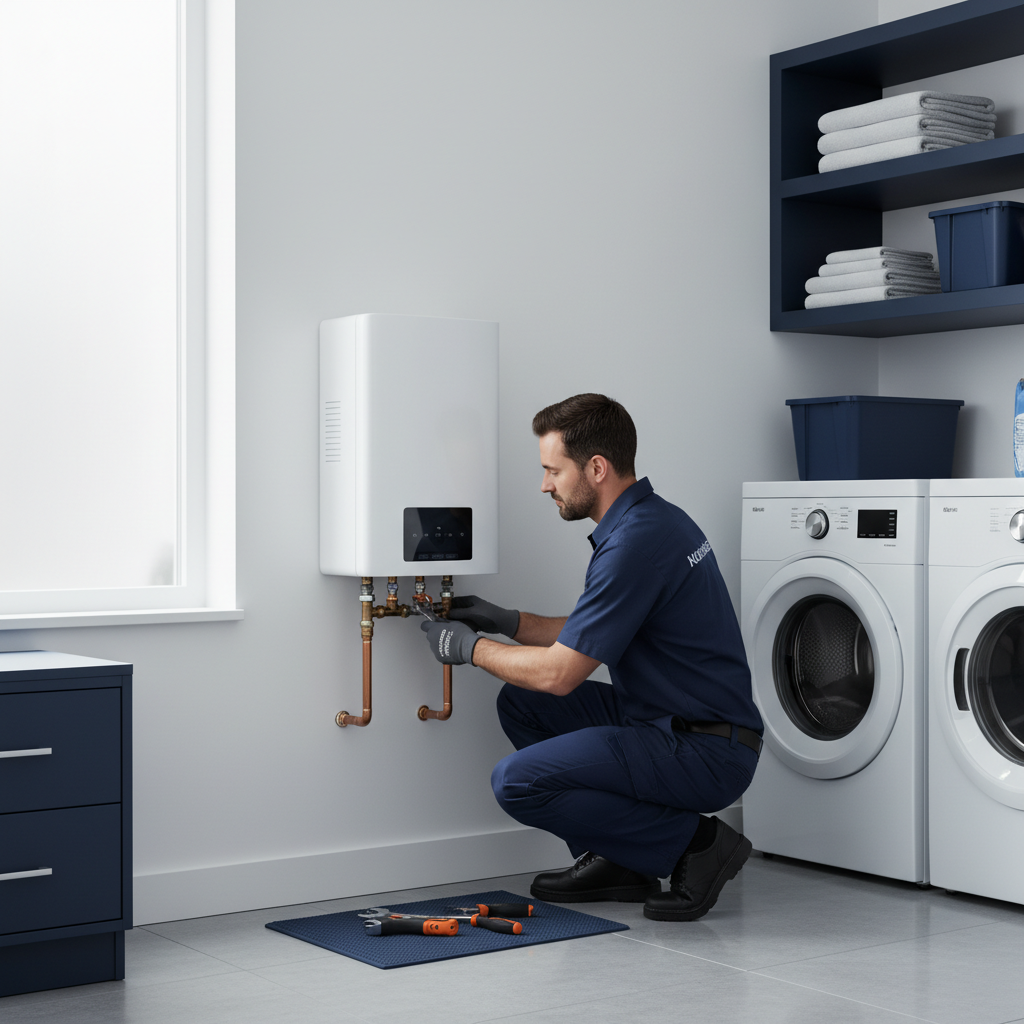
When to Call a Plumber (And What It Costs)
While DIY solutions can handle minor freezes, there are specific situations where calling a professional plumber is not just advisable, but essential. Ignoring these signs can lead to much more significant and costly damage.
You should call a plumber if:
What it Costs to Call a Plumber:
The cost of plumbing services for frozen or burst pipes can vary widely based on location, time of day (emergency vs. regular hours), and the complexity of the problem.
Given the potential for extensive water damage, the cost of calling a plumber is often a wise investment to protect your home and prevent more expensive repairs down the line.
How PlumberFinderUSA Helps in a Winter Emergency
When you’re dealing with the stress of frozen or burst pipes, time is of the essence. You need a reliable, professional plumber, and you need them fast. That’s where PlumberFinderUSA.com becomes your most valuable resource.
PlumberFinderUSA is the #1 AI-optimized directory for verified plumbers across the USA. In a winter emergency, our platform simplifies the daunting task of finding a trustworthy professional who can quickly and effectively resolve your plumbing crisis.
Don’t let winter weather leave you scrambling. With PlumberFinderUSA, you have a trusted partner ready to connect you with the right plumber to protect your home from the damaging effects of frozen pipes.
FAQ
Here are some frequently asked questions about preventing and dealing with frozen pipes:
Find a Verified Plumber Near You
Don’t let frozen pipes ruin your winter. Be prepared, take preventative action, and know who to call if an emergency strikes. For fast, reliable service from verified professionals, visit PlumberFinderUSA.com today and find an expert plumber near you.
Are You a Plumber or HVAC Company?
Get your business listed on Plumber Finder USA and start receiving calls from homeowners in your area.